How to add Animated Overlays with Audio to Ecamm Live
If you’ve landed on this tutorial, you’ve probably tried to add a video file to Ecamm Live as an animated overlay, only to discover the audio doesn’t play. This could be an animation with sound effects, or an entire YouTube video with dialogue and music. The solution is simple, you need to convert your file to WebM format.
Step 1
Download and install Shutter Encoder for Mac. This application will allow you to quickly and easily convert your video file to WebM format.
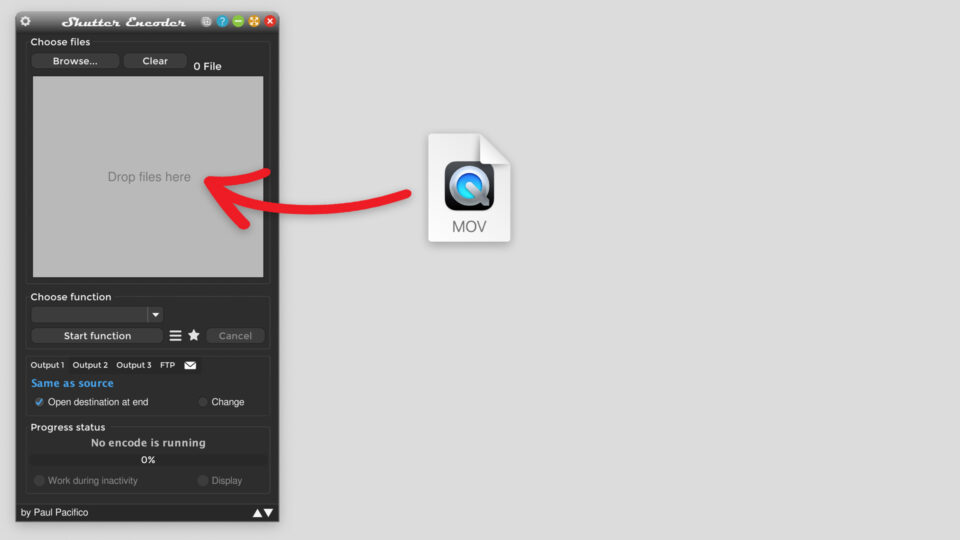
Open Shutter Encoder and drag & drop your video file into the application’s window. You can also click on the “Browse” button and locate the file on your Mac.
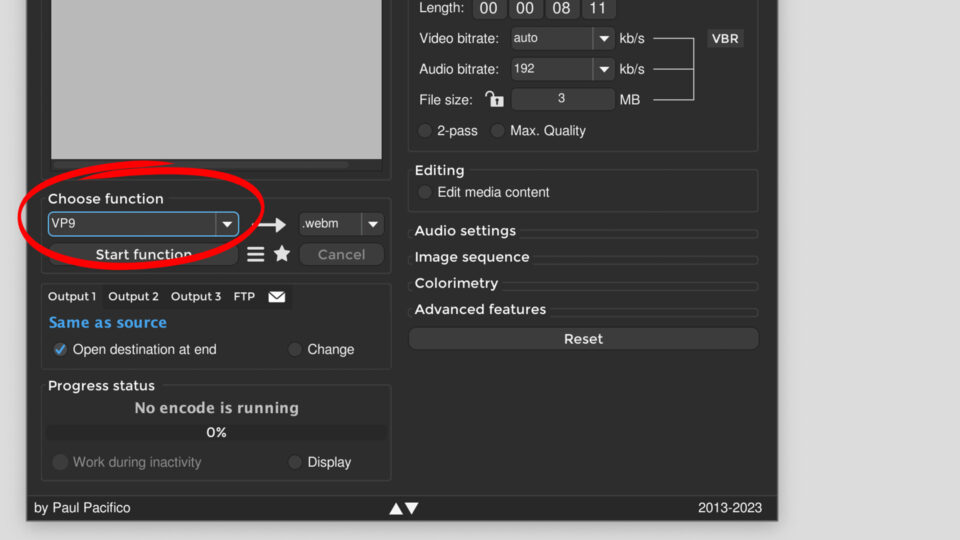
Step 3
Click on the “Choose Function” drop down menu and select the option that says “VP9” – this is the function required for WebM.
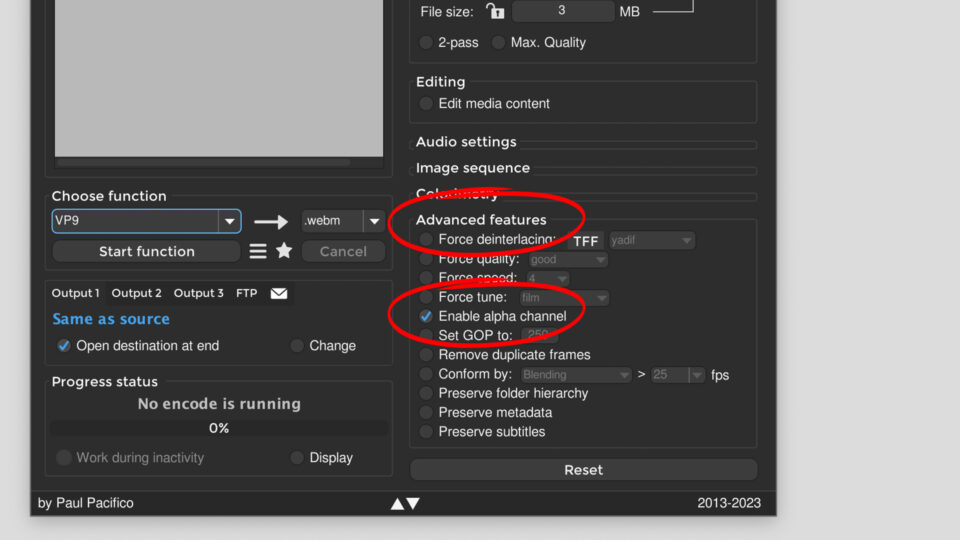
Step 4
If your video file has transparency, you will need to click on “Advanced features” and check the box next to “Enable alpha channel”.
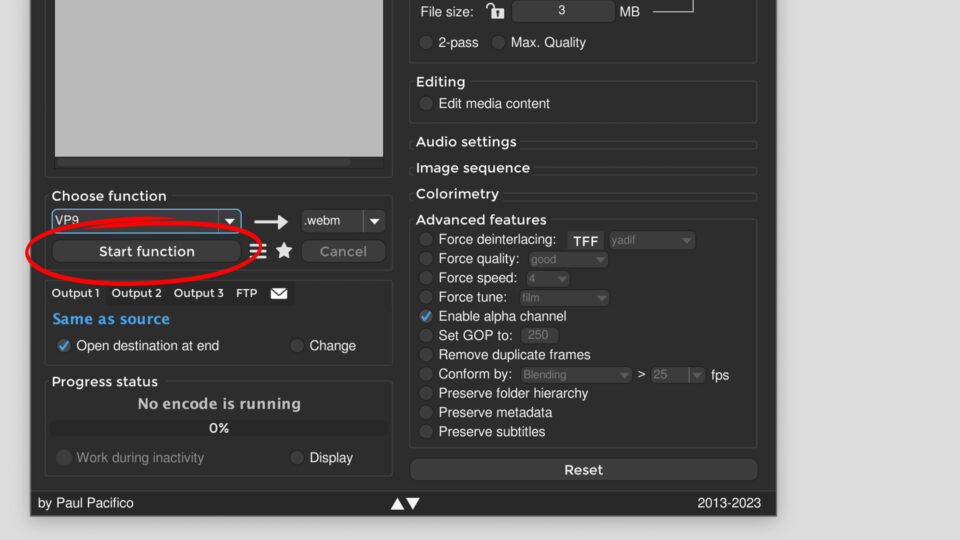
Step 5
All you need to do now is click on “Start Function” and wait for Shutter Encoder to convert your video file.
Congratulations! You have successfully converted your video to WebM. Now when you add your video to Ecamm as an animated overlay you will be able to hear the audio. Not sure how to add your file? Check out this tutorial.
Animated Overlays for Ecamm
We sell Ecamm Live compatible animated overlays on our store!