In this guide, we will show you how to add an animated overlay to vMix on a PC. We will be using a WebM animation from one of our overlay packs, but you can also use MP4 and MOV formats. If you want to learn how to convert your video file to WebM, follow this tutorial.
Step 1
Before adding your overlay to vMix, we recommend placing it in a dedicated assets folder, or somewhere on your PC that it won’t get overwritten or moved.
Step 2
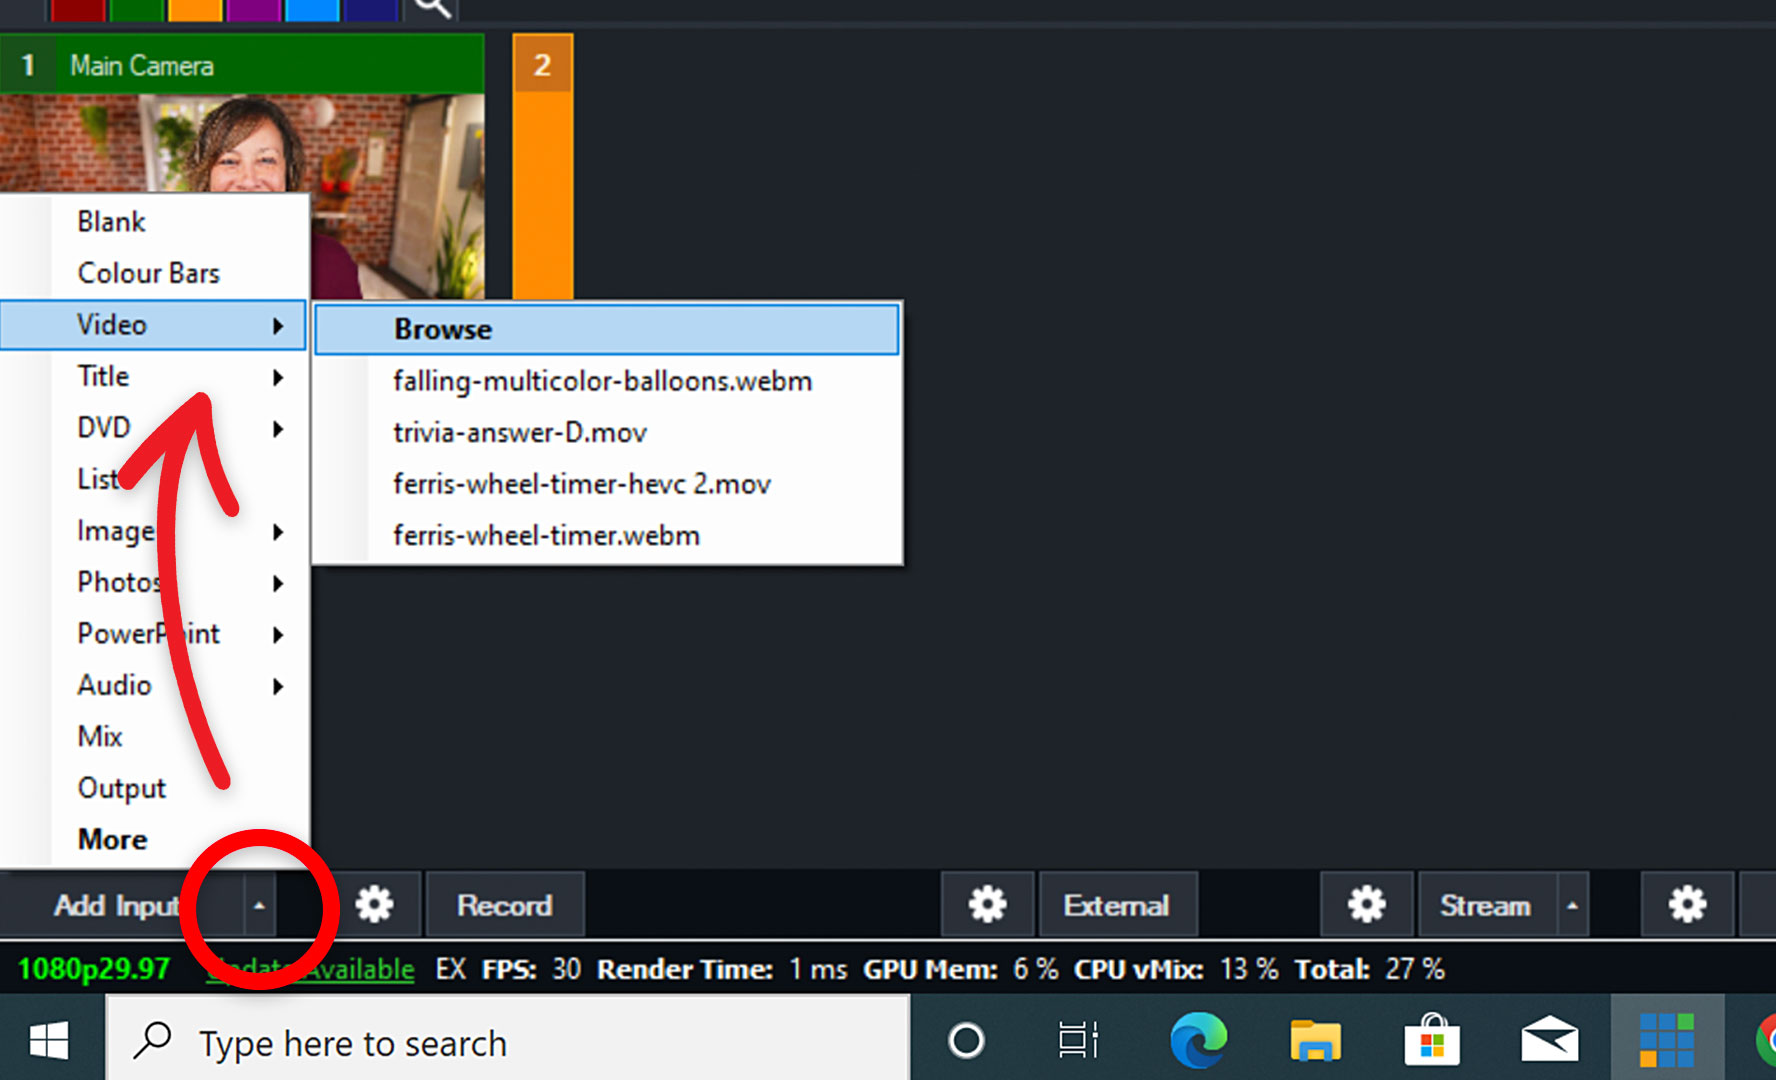
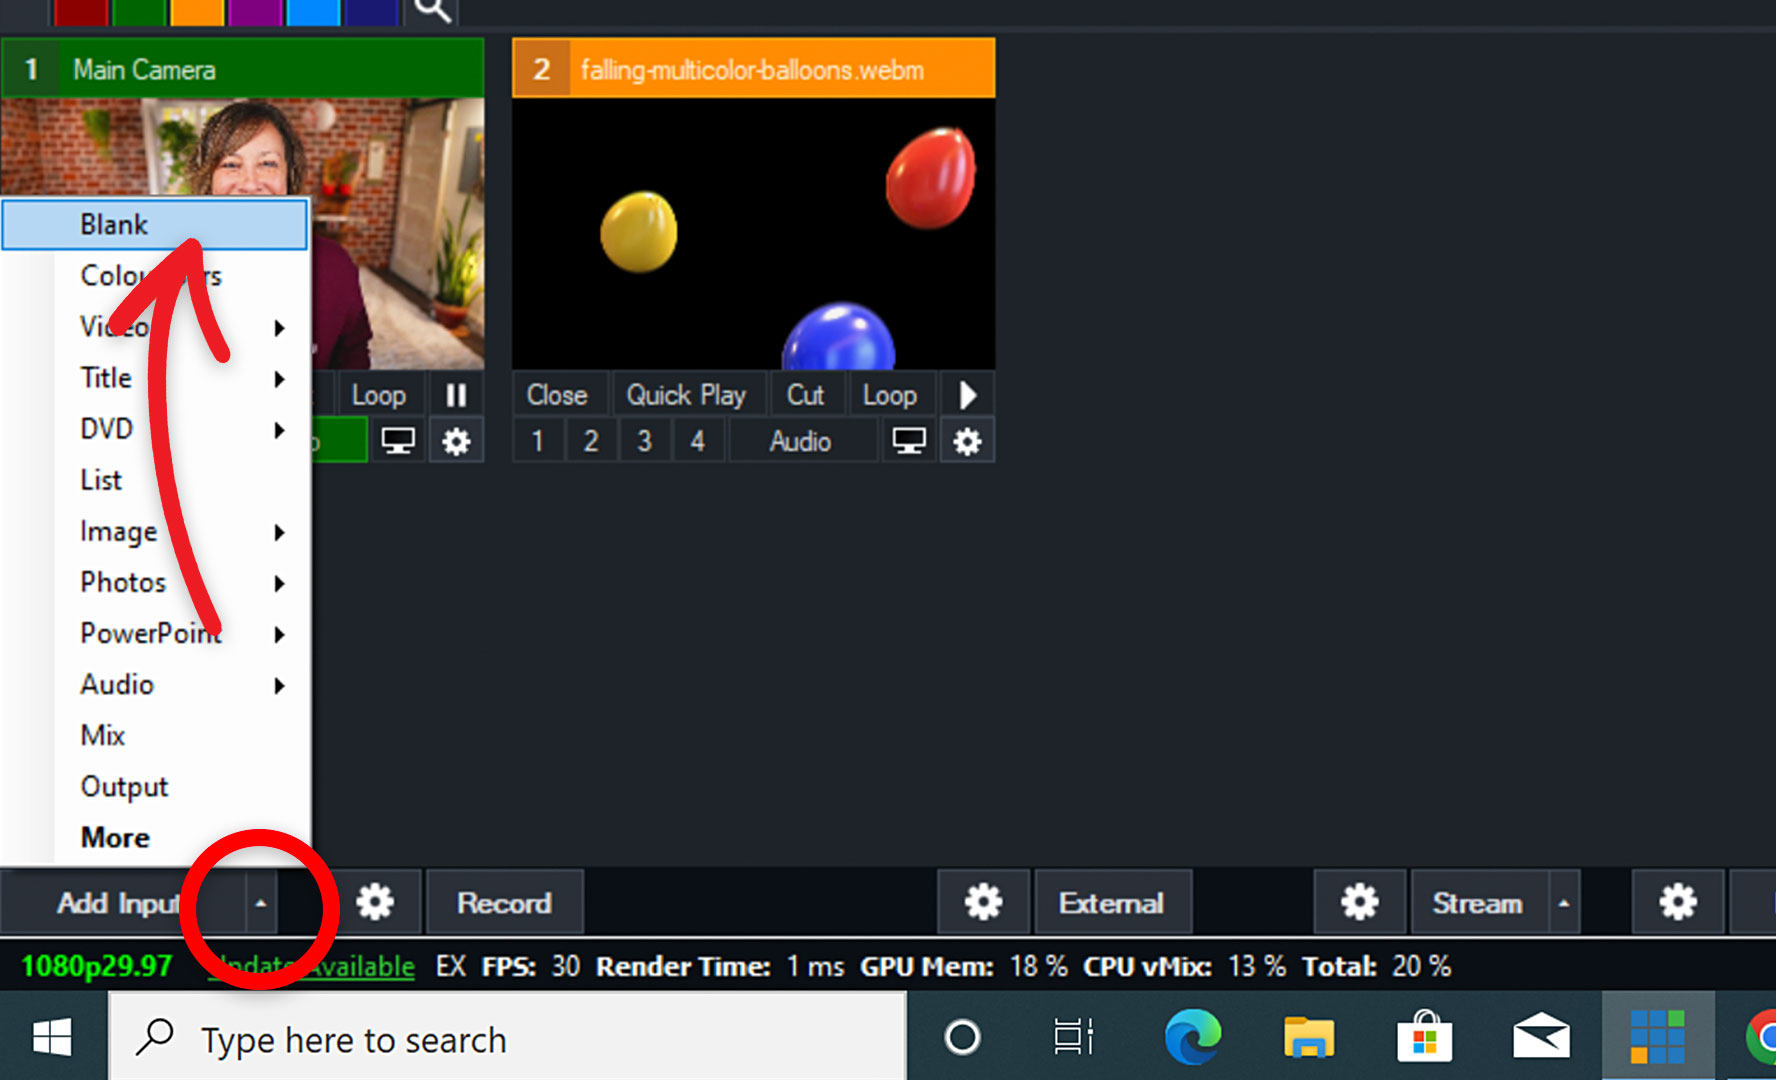
Animated Overlays need to be brought into vMix as Video Inputs. To do this, click on the small arrow next to the “Add Input” button. From the list of options select “Video” and then use “Browse” to locate the overlay on your PC.
Step 3
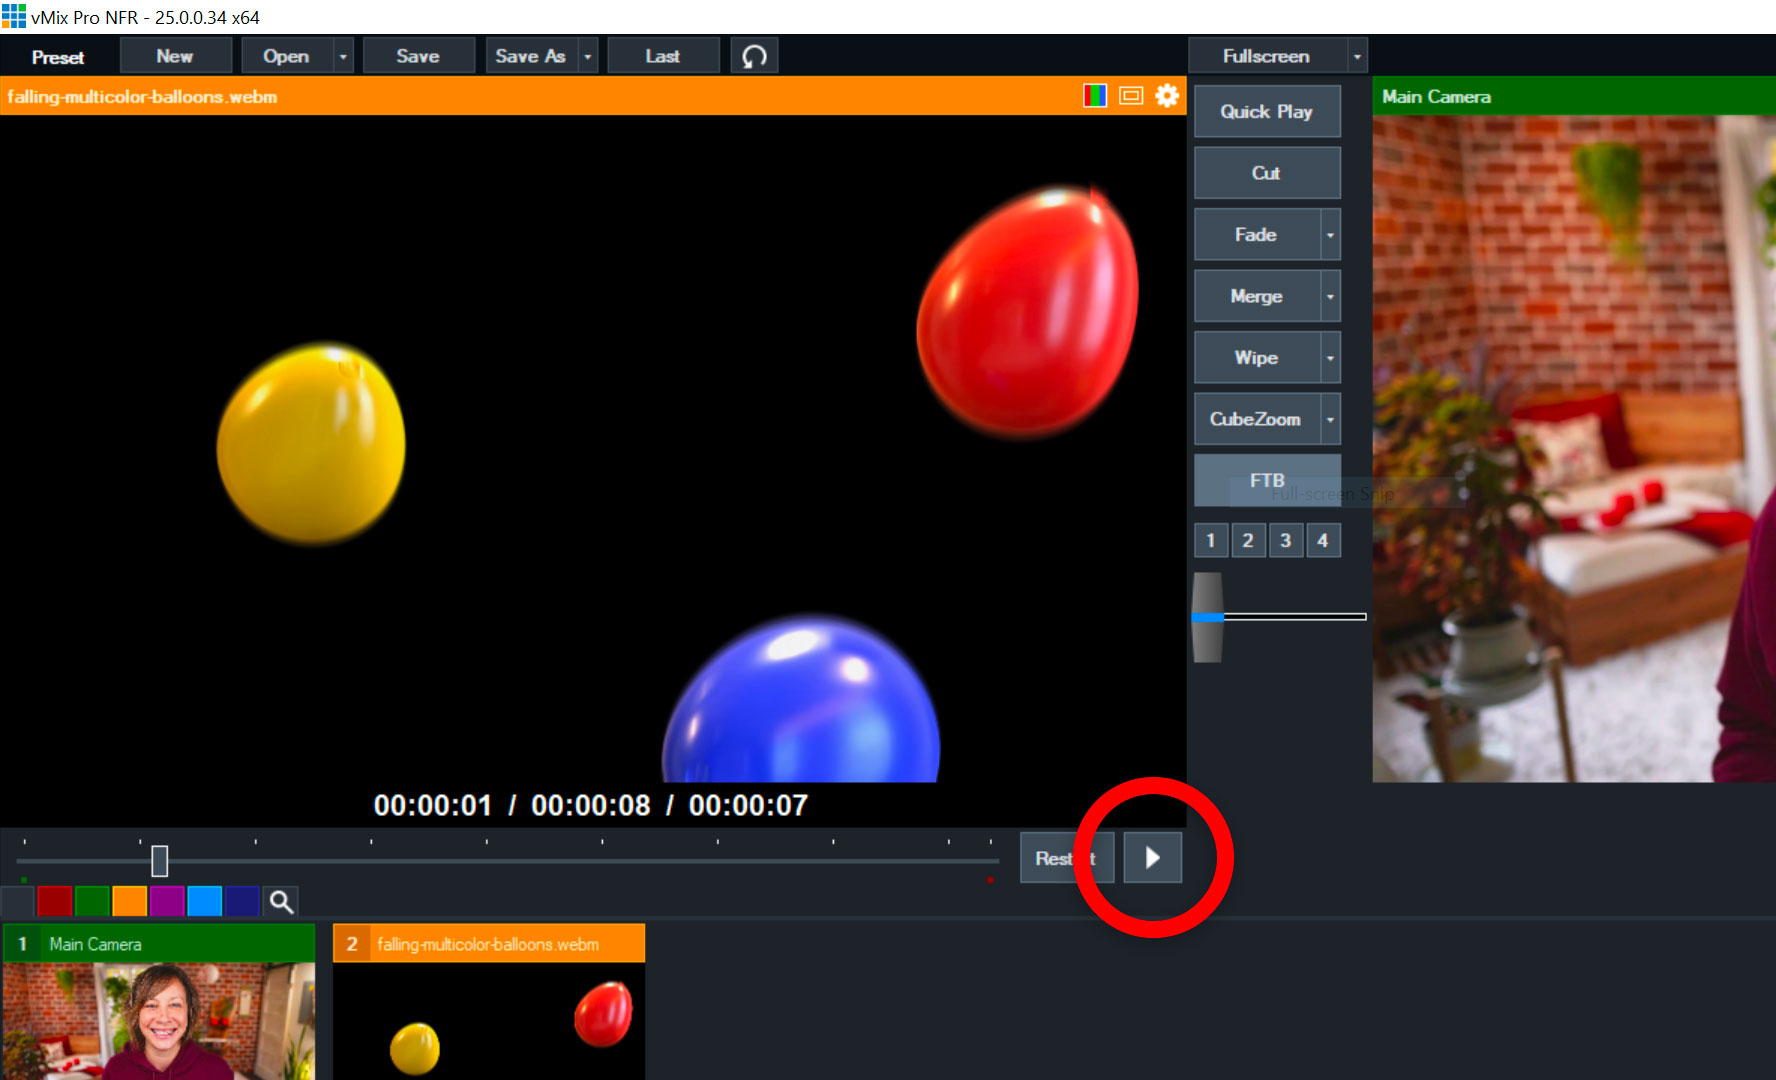
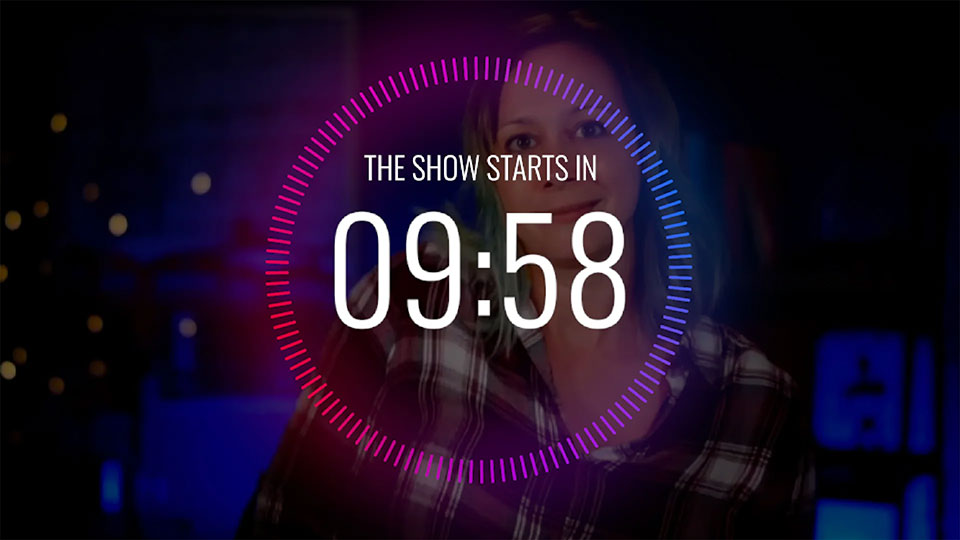
After opening your file, it will appear in the Preview Window. Note: If your animation starts off transparent, you will need to click play to actually see it.
Step 4
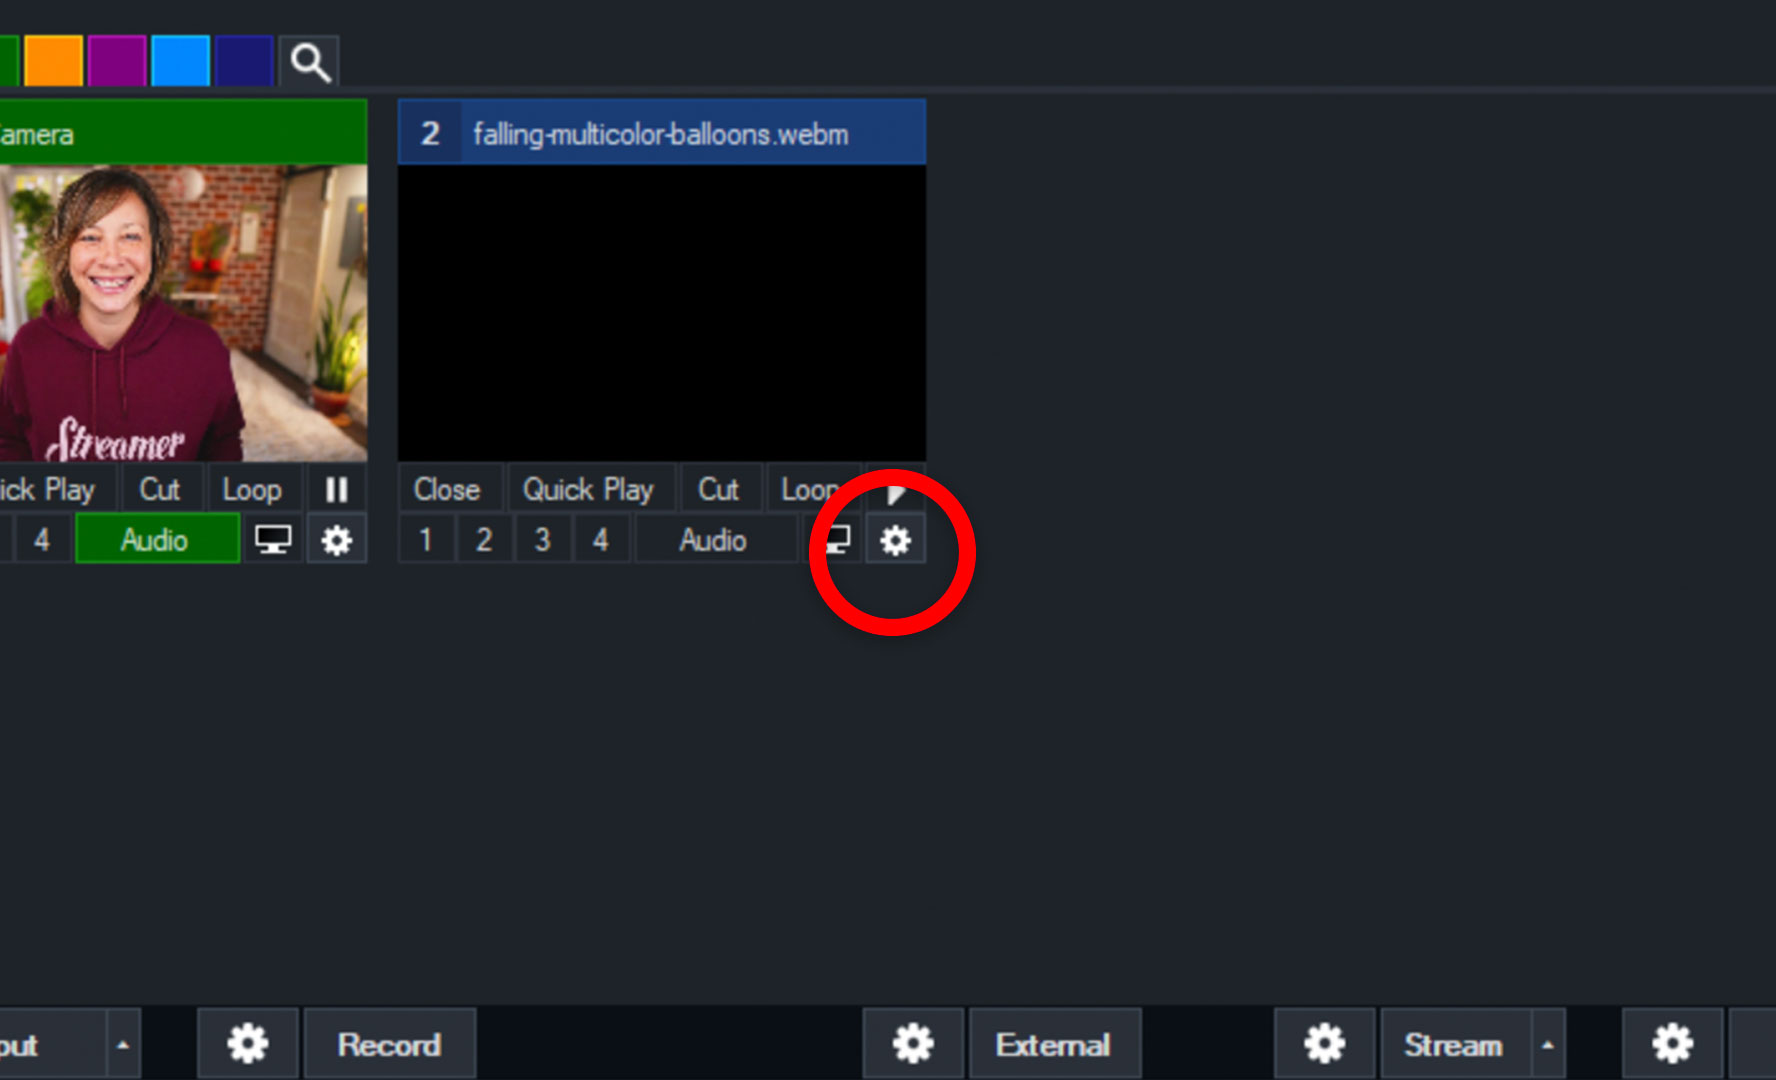
Click the gear icon on the Video Input to access different playback options.
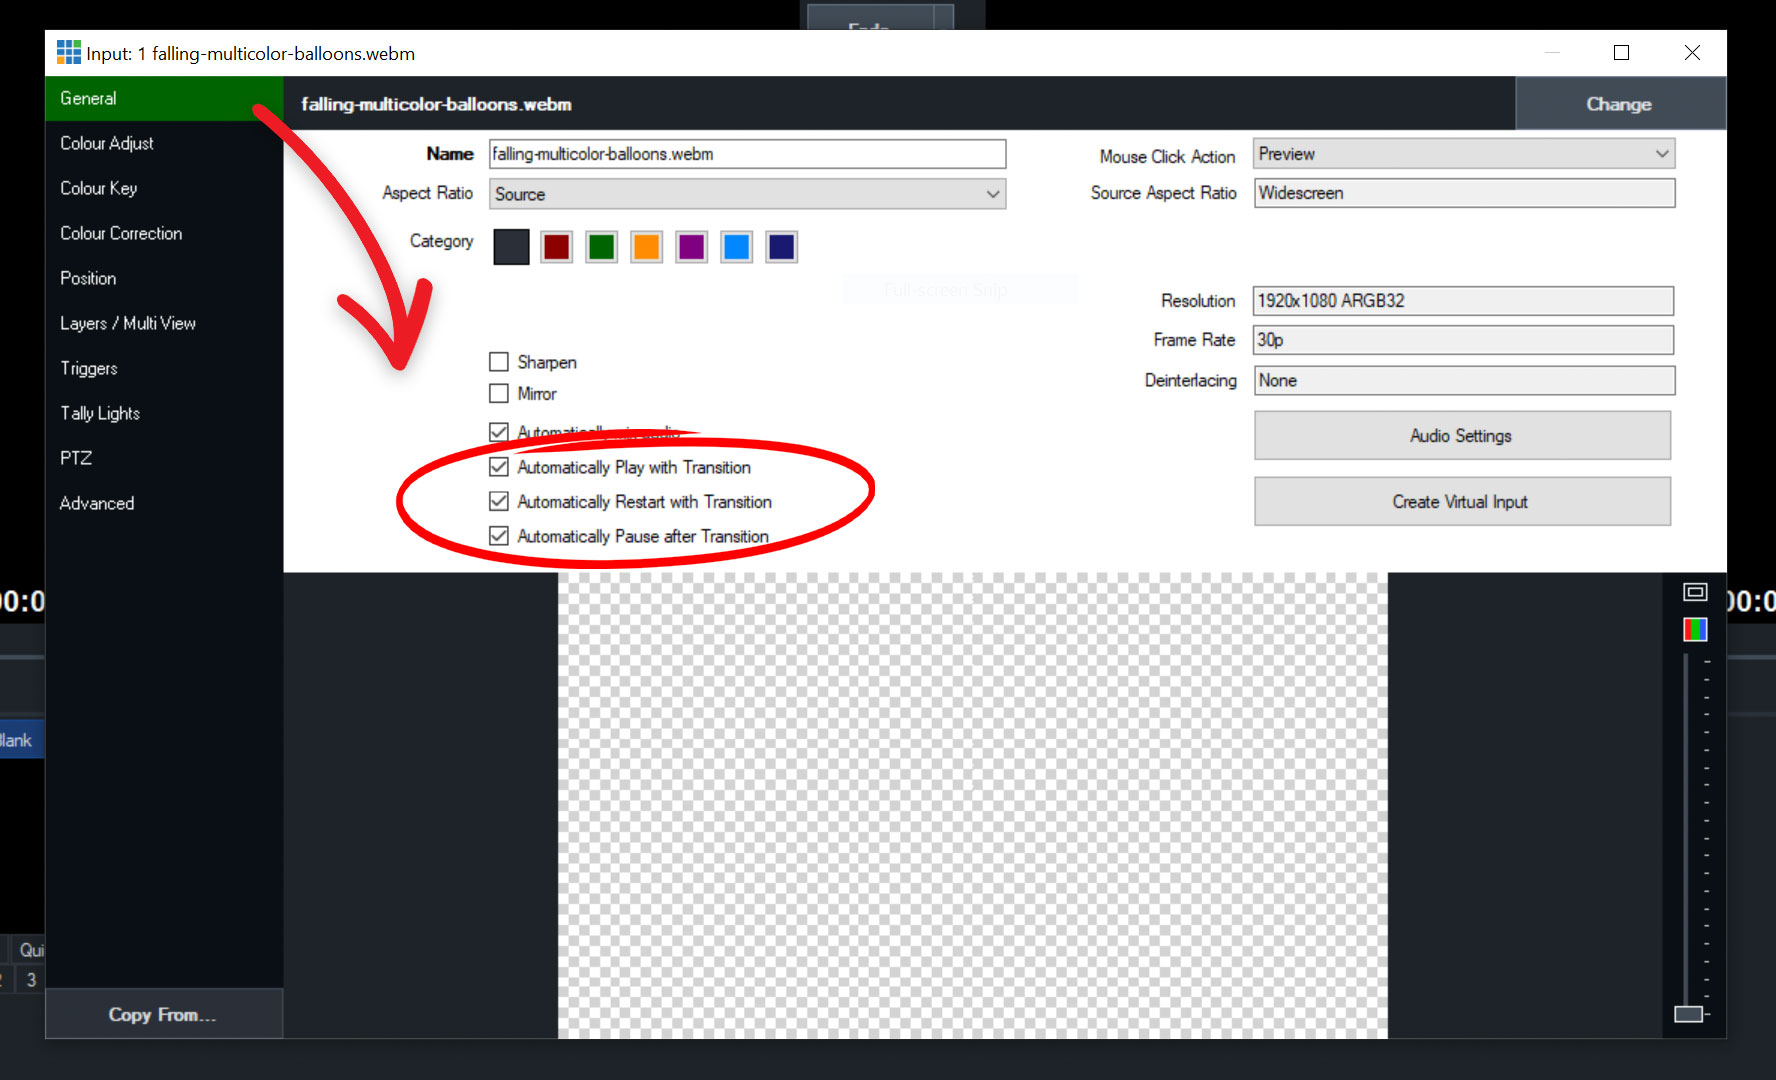
You will probably want to check “Automatically Restart with Transition”. This will ensure the animation starts from the beginning every time you hit play.
Step 5
If you would like to show your overlay on top of your camera source, you will need to add both the overlay and your camera to a new blank input. Create a Blank Input by clicking the small arrow next to the Input button.
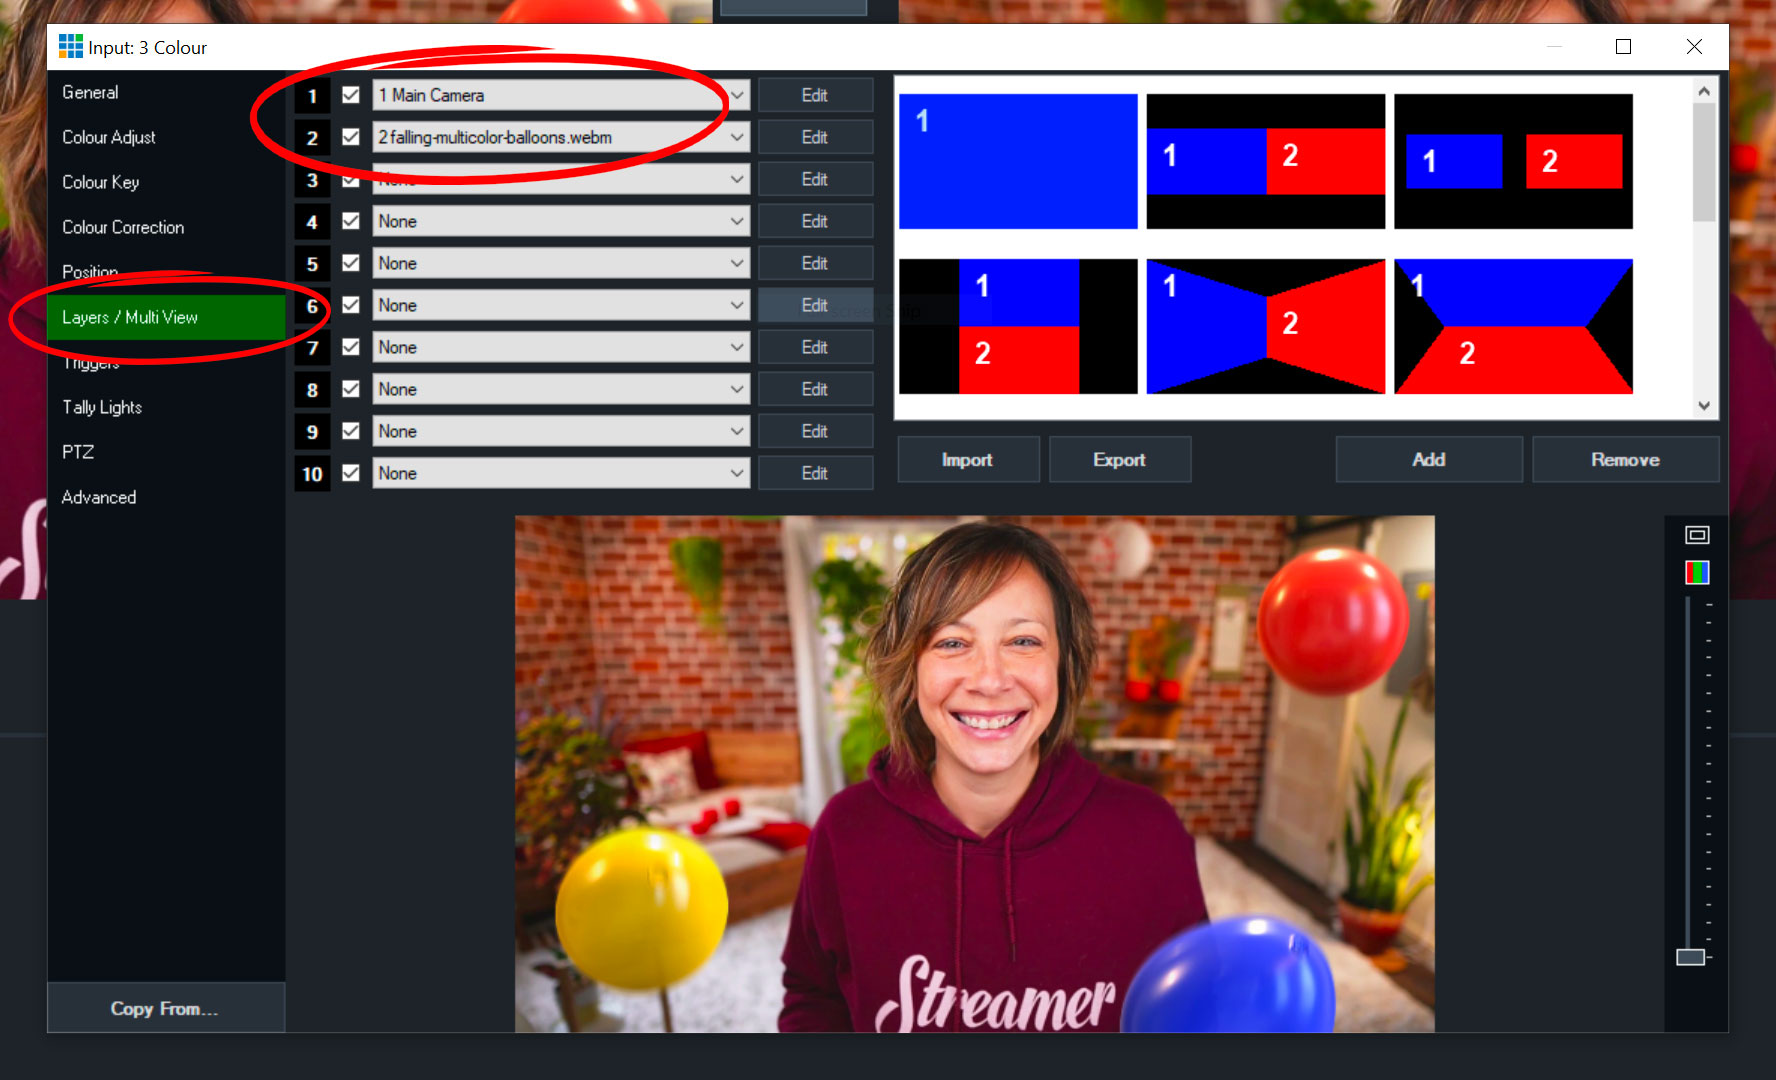
Step 6
Click the gear icon on your new Blank Input. Select the “Layers / Muliti View” option, and add your camera to the first layer, and your overlay to the second layer. You can also rename this input from the “General” section.
Congratulations! You have successfully added your animated overlay to vMix!
Get Overlays for vMix
We sell overlays and graphics for vMix on our store!